

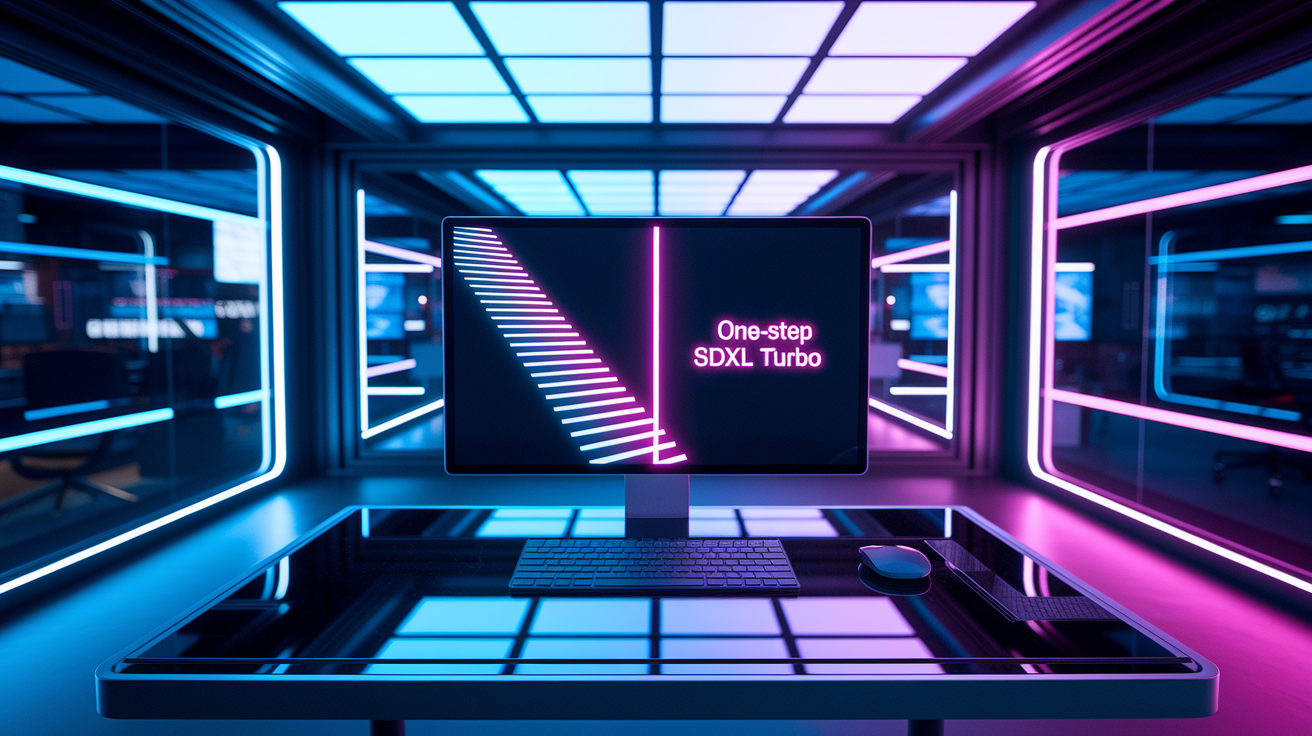
What if you could generate SDXL-quality images in under a second?
Stability AI’s SDXL Turbo collapses the usual 50-step diffusion pipeline into a single denoising pass using Adversarial Diffusion Distillation (ADD).
That means designers, developers, and product teams can get near-SDXL fidelity in interactive tools, live previews, and high-throughput services with much lower compute cost.
This post breaks down how one-step generation works, who benefits, and what to test before you deploy.
What SDXL Turbo Is and Why Speed Matters
SDXL Turbo is a text-to-image model built for real-time generation using Adversarial Diffusion Distillation (ADD). Where standard SDXL runs 50 diffusion steps, SDXL Turbo produces finished images in a single denoising step without tanking visual quality.
Image generation has always involved a tradeoff: speed versus fidelity. Traditional diffusion models like SDXL base deliver great detail and prompt adherence, but they need dozens of steps and minutes of processing time. SDXL Turbo collapses that pipeline into one step, pushing outputs in under a second on modern GPUs while keeping quality comparable to multi-step workflows.
This matters for interactive use cases. Live prompt iteration in creative tools. Rapid thumbnail previews in asset pipelines. Near-real-time generation in AR prototypes. For developers, faster inference means lower compute costs per image and higher throughput in production services.
Adversarial Diffusion Distillation borrows advantages from GANs: single-step output with minimal blur, while avoiding common distillation artifacts. Stability AI reports that SDXL Turbo with four steps matches the image quality of base SDXL run with 50 steps in blind human evaluations. At one step, SDXL Turbo outperformed a four-step LCM-XL variant in the same tests.
The practical result? A model that can generate a 512×512 image in 207 milliseconds on an Nvidia A100 using fp16 precision. Roughly 100 times faster than a 25-minute, 150-step run on a mid-range 8 GB GPU. That speed opens workflows that were impossible with earlier diffusion models. Live previews in design software. Bulk asset generation for game studios.
Community variants have emerged to extend SDXL Turbo’s capabilities. SDXL Turbo Plus, TurboVisionXL (TVXL-V2.0-BakedVAE), Tertium, and Realities Edge XL are among the builds that modify step counts, sampler compatibility, or training priors. Each variant has different sweet spots for steps, CFG scale, and samplers, so testing is essential before deployment.
SDXL Turbo is designed for developers who need speed without sacrificing too much fidelity, and for researchers exploring distillation techniques that push diffusion models closer to GAN-like responsiveness.
Performance Benchmarks: Speed Across Hardware and Resolutions

On an Nvidia A100, SDXL Turbo generates a 512×512 image in 207 milliseconds using fp16 precision. That measurement covers prompt encoding, a single denoising step, and final decoding. Standard SDXL base running 50 steps on the same hardware typically takes 3–5 seconds for the same resolution, making SDXL Turbo roughly 15–25× faster in that scenario.
Mid-range GPUs see similar relative gains. A 150-step SDXL base run on an 8 GB GPU took approximately 25 minutes per image in one documented experiment. SDXL Turbo produced comparable output quality in five steps in about 15 seconds. A roughly 100× speedup. Even at higher resolutions like 1024×1024, SDXL Turbo completed images in under two seconds on high-end consumer GPUs (RTX 4090 class).
Latency scales with resolution. Typical reported ranges for optimized SDXL Turbo setups:
512×512: 0.1–0.6 seconds per image on A100 or RTX 4090 with ONNX Runtime or TensorRT.
768–1024×1024: 0.3–1.5 seconds per image on the same class of GPU with fp16 and kernel fusion.
1344×768 or 896×1152: 0.5–2.0 seconds depending on batch size and runtime optimizations.
Batching yields near-linear throughput gains when VRAM permits. A batch of four 512×512 images can approach 3–4× the throughput of single-image inference, depending on GPU architecture and memory bandwidth. Larger batches (8–16 images) show diminishing returns due to memory swapping and IO overhead.
Community benchmarks using Automatic1111 Web UI show that DPM++ 2S a Karras, DPM++ SDE Karras, and Euler a samplers consistently delivered clean outputs across three to ten steps. Other samplers (DPM++ 2M SDE Exponential, DPM++ 2M SDE Karras, DPM++ 3M SDE, DDIM, and UniPC) also produced usable results without visible noise artifacts at step counts between six and twenty.
Hardware context matters. Minimum VRAM for interactive SDXL Turbo inference is around 8 GB with heavy optimization (fp16, model offloading, or quantization). Recommended configurations use 16–24 GB for 1024×1024 at interactive speeds, and 40–80 GB for multi-model or large-batch production workloads. CPU inference is possible but much slower. Expect seconds to tens of seconds per image, making it unsuitable for interactive workflows.
Storage and serving patterns also affect real-world performance. Model weights typically occupy 3–6 GB in fp16 format after sharding. Fast NVMe storage reduces cold-start times in containerized deployments. Warm GPU pools or persistent containers avoid the multi-second delay of loading weights from disk on each request.
Speedup versus SDXL base varies by runtime optimization. PyTorch inference without optimization yields roughly 3–5× speedup at one step. Adding ONNX Runtime with CUDA or DirectML pushes that to 5–8×. Compiling to TensorRT with int8 quantization and operator fusion can achieve up to 10× speedup in favorable workloads, though with minor quality tradeoffs from aggressive quantization.
How Adversarial Diffusion Distillation Works

Adversarial Diffusion Distillation (ADD) trains SDXL Turbo to approximate the full multi-step diffusion process in a single forward pass. Traditional distillation techniques compress a teacher model’s multi-step behavior into a student model with fewer steps, but often suffer from blurring and loss of fine detail. ADD introduces an adversarial loss (borrowed from GAN training) to preserve sharpness and microstructure.
The core idea is to train the student model (SDXL Turbo) to produce outputs that are indistinguishable from the teacher model (SDXL base) in a single step, while also satisfying an adversarial discriminator that penalizes blurred or artifact-heavy images. This dual objective forces the student to learn sharp, high-frequency details that typical distillation losses miss.
During training, the student generates images in one denoising step from random noise. The discriminator evaluates whether each image looks like a real photo or a synthetic output. The student’s loss function combines reconstruction error (how closely the one-step output matches the teacher’s 50-step result) and adversarial error (how well it fools the discriminator). This combination drives the student toward GAN-like sharpness without the mode collapse or training instability common in pure GAN setups.
Sampling behavior changes significantly. Standard SDXL uses iterative denoising. Each step refines the image by removing a small amount of noise. SDXL Turbo collapses this into a single prediction: given a noisy latent, predict the final clean image in one shot. The model learns a direct mapping from noise to finished output, skipping intermediate steps entirely.
This single-step operation means the sampler’s role is minimal. Traditional samplers like DPM++ or Euler exist to navigate the multi-step trajectory through latent space, but SDXL Turbo’s training makes that trajectory trivial. Most of the work happens in the single forward pass. Sampler choice has less impact on final quality than it does in multi-step diffusion, though some samplers still handle edge cases or resolution mismatches better than others.
CFG (Classifier-Free Guidance) still applies, but optimal ranges shift. Multi-step SDXL often uses CFG values of 7–14 to balance prompt adherence and image naturalness. SDXL Turbo works best at lower CFG, typically 1.0–3.0, with common working values around 2.0–2.5. Higher CFG can introduce artifacts or over-saturate colors because the single-step prediction doesn’t have multiple iterations to smooth out guidance errors.
Model architecture remains largely unchanged from SDXL base. Same U-Net backbone, same VAE decoder, same text encoder. The distillation process retrains the weights to perform the single-step mapping, but doesn’t require architectural modifications. This means SDXL Turbo can drop into existing SDXL pipelines with minimal code changes. Just swap the checkpoint and adjust step count and CFG.
Training data and priors matter. SDXL Turbo inherits the training data biases of SDXL base, so outputs reflect those priors. Community variants often fine-tune on additional datasets to shift the style or subject distribution. TurboVisionXL emphasizes photorealism, while Tertium leans toward stylized illustrations. These priors become more visible in single-step generation because there’s no iterative refinement to smooth over biases.
The adversarial component introduces minor instability during training. ADD requires careful tuning of the discriminator learning rate and adversarial weight to avoid mode collapse or discriminator overfitting. Stability AI’s published research includes specific hyperparameters and training schedules that balance reconstruction and adversarial objectives.
Practical impact for developers: SDXL Turbo’s single-step design means inference code simplifies to a single model.forward() call in PyTorch, or a single session.run() in ONNX. No loop over steps, no scheduler state, no intermediate latents to manage. This reduces code complexity and eliminates a common source of bugs in multi-step pipelines.
Step Counts, CFG Guidance, and Sampler Effects

SDXL Turbo is designed for single-step operation, but also supports multi-step inference when higher fidelity is required. Step counts of 1, 3, 4, 6, 9, 10, 15, and 20 are common in experimentation, with quality improving modestly as steps increase.
At one step, SDXL Turbo produces usable images with good composition and color, but fine details and texture can be softer than multi-step runs. Four steps often hit a sweet spot. Image quality approaches 50-step SDXL base in blind evaluations, and inference time stays well under one second on modern GPUs. Beyond ten steps, quality gains diminish, and you’re better off switching to a full SDXL model if you need maximum fidelity.
Community model variants have different step requirements. SDXL Turbo Plus and TurboVisionXL work well at 3–6 steps. Realities Edge XL variants often need 10+ steps to produce acceptable coherency; five steps can look messy or noisy. Tertium sits in the middle, delivering clean results at 6–9 steps. Always check the example images and metadata for a given model to find its preferred step range.
CFG scale controls how strongly the model follows the prompt versus producing a natural-looking image. Multi-step diffusion models typically use CFG values of 7–14. SDXL Turbo works best at much lower CFG: 1.0 to 3.0, with 2.0–2.5 being the most reliable range. Higher CFG introduces color oversaturation, edge artifacts, or unnatural contrast because the single-step prediction doesn’t have multiple iterations to balance guidance strength.
Experimenting with CFG: run a matrix test with CFG values of 1.5, 1.75, 2.0, 2.25, 2.5, and 3.0 at a fixed step count (for example, six steps) to see where your chosen model produces the cleanest, most prompt-accurate results. For most SDXL Turbo variants, CFG above 3.0 starts to degrade quality.
Sampler choice matters less in SDXL Turbo than in multi-step diffusion, but some samplers handle edge cases better. The following samplers produced noise-free, usable outputs across multiple experiments with SDXL Turbo Plus:
| Sampler | Noise-Free at Steps |
|---|---|
| DPM++ SDE Karras | 3–20 |
| DPM++ 2M SDE Exponential | 6–20 |
| DPM++ 2M SDE Karras | 6–20 |
| Euler a | 3–20 |
| Euler | 3–20 |
| DPM2 | 6–20 |
| DPM2 a | 6–20 |
| DPM++ 2S a | 3–20 |
| DPM++ SDE | 3–20 |
| DPM++ 2M SDE Heun Karras | 6–20 |
| DPM++ 2M SDE Heun Exponential | 6–20 |
| DPM++ 3M SDE | 6–20 |
| DPM++ 3M SDE Exponential | 6–20 |
| DPM adaptive | 6–20 |
| LMS Karras | 6–20 |
| DPM2 Karras | 6–20 |
| DPM2 a Karras | 6–20 |
| DPM++ 2S a Karras | 3–20 |
| DDIM | 6–20 |
| UniPC | 6–20 |
Top-performing samplers for SDXL Turbo Plus in side-by-side comparisons were Euler a, DPM++ 2S a Karras, DPM++ SDE Karras, and DPM++ SDE. These delivered consistently sharp, artifact-free images across resolutions and prompts.
Some samplers introduced visible noise or artifacts at very low step counts (1–3 steps). If you’re committed to one-step inference, stick with Euler a or DPM++ SDE Karras. If you’re running 6+ steps, most of the listed samplers will work fine.
Sampler testing workflow: use an X/Y/Z plot in Automatic1111 to test multiple samplers and step counts simultaneously. Set the X axis to a list of samplers, the Y axis to step values (for example, 3, 6, 9), and keep CFG fixed at 2.0. Run the grid and visually compare the outputs to identify the best sampler for your model and prompt style.
Resolution and sampler interaction: some samplers handle non-standard resolutions (1344×768, 896×1152) better than others. Euler a and DPM++ 2S a Karras were most forgiving of aspect-ratio variations in testing. DDIM and DPM adaptive occasionally produced edge artifacts at extreme aspect ratios.
Negative prompts still work and are useful for suppressing common artifacts. For example, adding “blurry, soft focus, watermark, text” to the negative prompt can clean up outputs when using aggressive single-step settings. Negative prompts are processed through the same CFG mechanism, so keep CFG low to avoid over-correcting.
Seed control is identical to other diffusion models. Same integer seed produces the same image given identical prompt, model, sampler, steps, CFG, and resolution. Use fixed seeds for reproducibility in A/B tests or when iterating on prompt phrasing.
Practical Setup: Automatic1111 X/Y/Z Plot Workflow

Automatic1111 Web UI’s X/Y/Z Plot script is the fastest way to test multiple samplers, step counts, and CFG values simultaneously. The workflow produces a grid of images, making it easy to compare settings side-by-side.
Start by entering your prompt in the main prompt box. If you’re using Dynamic Prompts with wildcard files, enable that extension and structure your prompt with the wildcard syntax (for example, a {color} car where {color} points to a list of values). Add a negative prompt if you want to suppress specific artifacts. Common entries include blurry, low quality, watermark, text, signature.
Set CFG scale to your baseline test value, typically 2.0 or 2.5 for SDXL Turbo. If you’re testing CFG as a variable, you’ll override this in the plot settings.
Choose a resolution. Common test resolutions for SDXL Turbo include 1024×1024 (square), 1344×768 (wide), 896×1152 (portrait), and 1152×896 (landscape). Lower resolutions like 512×512 run faster but don’t stress-test the model’s detail capabilities.
In the script dropdown at the bottom of the interface, select X/Y/Z Plot. Two checkboxes appear: “Keep -1 for seeds” and “Use text inputs instead of dropdowns.” Enable both. Keeping -1 for seeds ensures each image uses a unique random seed, which helps you see how consistent the model is across different starting points. Text inputs let you paste long lists of samplers or values without clicking through menus.
Set the X axis to Sampler. Click the small “fill” button next to the input field to auto-populate the full list of available samplers, then delete any you don’t want to test. A common starting list for SDXL Turbo is Euler a, DPM++ 2S a Karras, DPM++ SDE Karras, DPM++ SDE, DPM++ 2M SDE Karras, DDIM, UniPC.
Set the Y axis to Steps. Enter your test step values as a comma-separated list. For example, 3, 6, 9 or 10, 15, 20. If you’re testing very low step counts, consider 1, 3, 6. If you’re testing CFG instead of steps, set the Y axis to CFG Scale and enter values like 1.5, 1.75, 2.0, 2.25, 2.5.
Leave the Z axis empty unless you’re testing a third variable (for example, different model checkpoints or LoRA strengths). Most experiments stick to two variables to keep the grid readable.
Calculate batch size. If you’re testing 4 samplers and 3 step values, that’s 12 images per batch. Setting Batch count to 9 produces 108 total images (12 images × 9 batches). Adjust batch count based on how much variation you want to see across random seeds.
Click Generate. The script will produce a grid image with samplers along the X axis and step counts (or CFG values) along the Y axis. Each cell in the grid is labeled with the settings used, making it easy to identify the best combination.
Example workflow for SDXL Turbo Plus:
Prompt: professional photo of a modern office interior, natural lighting, wide angle
Negative prompt: blurry, low quality, distorted, text
Resolution: 1024×1024
CFG: 2.0
X axis: Euler a, DPM++ 2S a Karras, DPM++ SDE Karras, DPM++ SDE
Y axis: 3, 6, 9
Batch count: 9
This setup generates 108 images (4 samplers × 3 step values × 9 batches) in a few minutes on a mid-range GPU. Review the grid to see which sampler and step count produce the cleanest, most detailed results for your prompt style.
Save the grid image and use it as a reference when configuring production inference. If DPM++ 2S a Karras at 6 steps consistently outperforms other settings, lock that in for future runs.
For deeper testing, run a second pass with the Z axis set to CFG Scale (values like 1.5, 2.0, 2.5) to find the optimal CFG for your chosen sampler and step count. This creates a three-dimensional grid (sampler × steps × CFG) but produces very large output images, so limit batch count to 1–3.
The X/Y/Z Plot script also supports Checkpoint name as a variable, so you can test multiple SDXL Turbo variants (SDXL Turbo Plus, TurboVisionXL, Tertium) in one run. Set the X axis to Checkpoint name, paste the model names, and set Y axis to Steps. This workflow quickly reveals which model variant works best for your use case.
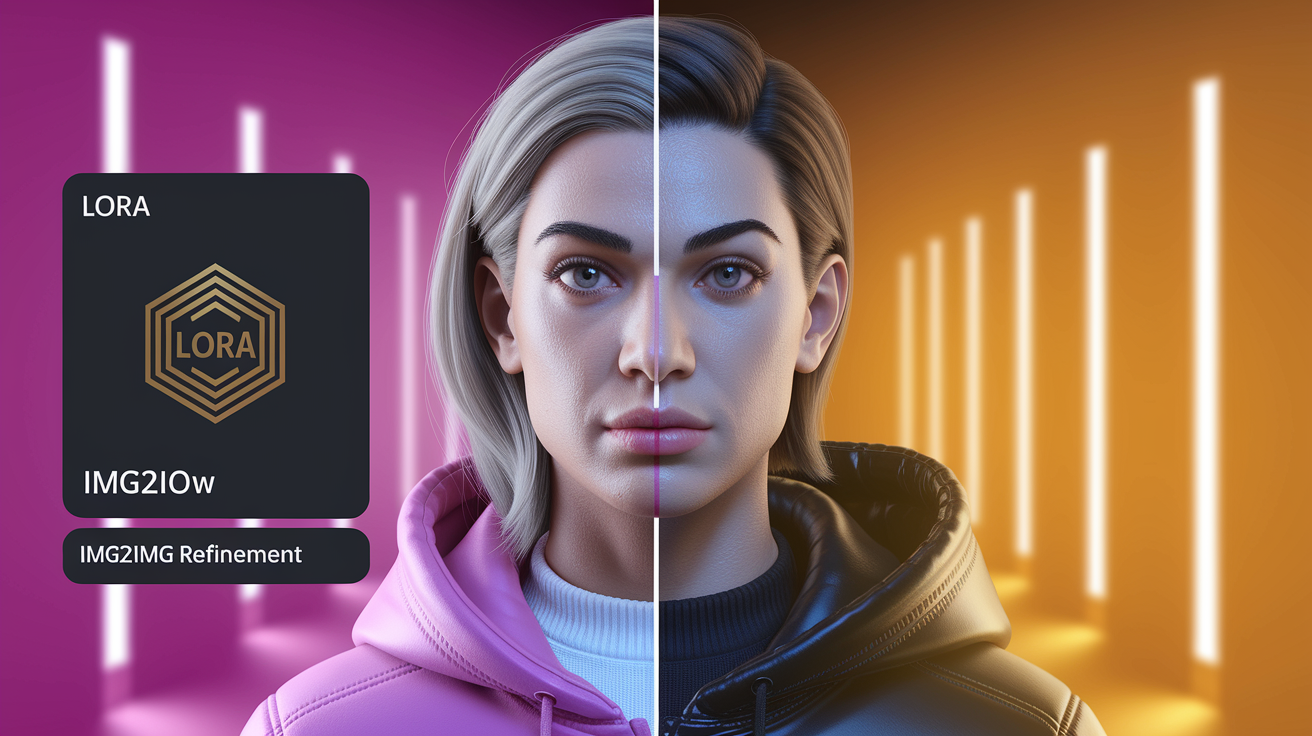
LoRA Compatibility and Img2img Refinement Workflow
Some SDXL Turbo variants support LoRA models, which add style or subject biases to the base model. LoRA compatibility varies by checkpoint. SDXL Turbo Plus and TurboVisionXL show visible LoRA effects, while some community builds have minimal LoRA response due to aggressive distillation that flattened the latent space.
To test LoRA compatibility, load a well-known LoRA (for example, a photorealism enhancer or a specific art style) and generate a batch of images with and without the LoRA enabled. If the outputs show clear style shifts, the model is LoRA-friendly. If results look identical, the distillation process likely reduced LoRA influence.
LoRA is useful for rapid style batching. Load a “cinematic lighting” LoRA, generate 50 images with SDXL Turbo at 6 steps, then filter for the best 5. This workflow is much faster than running 50 images through a multi-step SDXL model with the same LoRA.
Img2img refinement is the most practical way to polish rough SDXL Turbo outputs. The workflow takes a low-step Turbo image and upscales or refines it using a higher-fidelity model or more steps.
Step-by-step img2img refinement:
Generate a batch of images with SDXL Turbo at 3–6 steps. Keep CFG low (2.0–2.5) and resolution at 1024×1024 or lower.
Review the batch and pick the images with the best composition and subject placement. Ignore fine details at this stage. You’re looking for good “bones.”
Right-click on a chosen image in the Automatic1111 gallery and select Send to img2img.
In the img2img tab, set Resize mode to Resize by and enter a scale factor. 1.75 is a common starting point. This upscales 1024×1024 to 1792×1792.
Set Denoising strength to 0.2 or 0.25. Lower values preserve more of the original image; higher values give the model more freedom to change details. For subtle refinement, stay at 0.2. For more aggressive reprocessing, try 0.3–0.5.
Switch the sampler to Euler a for a smoother, less noisy refinement pass. Euler a is forgiving and works well for img2img at moderate denoising strengths.
Optionally, switch the model to a different checkpoint. For example, swap from SDXL Turbo Plus to base SDXL or a community fine-tune optimized for photorealism. This reprocesses the rough Turbo output with a higher-quality model.
Set steps to 10–20 for the img2img pass. Since you’re starting from a nearly finished image, you don’t need 50 steps.
Generate. The output will retain the composition and layout of the Turbo image but with improved texture, lighting, and fine details.
Example settings for a photorealism refinement pass:
Original: SDXL Turbo Plus, 6 steps, CFG 2.0, 1024×1024, DPM++ 2S a Karras
Img2img: base SDXL, Euler a, 15 steps, CFG 7.0, resize by 1.75, denoising 0.25
This two-stage workflow combines SDXL Turbo’s speed for exploration with base SDXL’s quality for final renders. You can generate 100 rough drafts in minutes, pick the best 5, and refine them in under a minute each.
Higher denoising strengths (0.4–0.7) start to deviate significantly from the original image. This is useful when the Turbo output has the right composition but wrong colors or subject details. At 0.7, the img2img pass becomes more of a guided generation than a refinement.
Another refinement pattern: use SDXL Turbo for thumbnails at 512×512, then upscale to 2048×2048 with a dedicated upscaler (Real-ESRGAN, LDSR, or a fine-tuned SDXL img2img pass). This is faster than generating directly at high resolution and gives you more control over final sharpness.
Img2img refinement also works with prompt adjustments. If the Turbo image captured the right scene but missed a detail, add that detail to the prompt during the img2img pass. Original prompt: sunset over mountains. Img2img prompt: sunset over mountains, golden hour lighting, lens flare. The refinement pass will add the lighting details without changing the mountain silhouette.
Batch img2img: if you have 20 rough Turbo outputs to refine, use the batch processing tab in Automatic1111. Point it to a folder of Turbo images, set your img2img parameters (resize, denoise, sampler, steps), and let it run overnight. This is efficient for production workflows where you generate hundreds of drafts and refine dozens.
Known Issues and Quality-Mitigation Tactics

SDXL Turbo trades speed for subtle quality losses. The most common issues are softer fine details, weaker prompt adherence for complex multi-object scenes, and stronger model priors that push outputs toward the training data distribution.
Fine detail softness appears most visibly in textures: fabric weave, skin pores, hair strands, and text. Single-step generation doesn’t have the iterative refinement that multi-step diffusion uses to sharpen these elements. Mitigation: run 4–6 steps instead of 1, or use img2img refinement with a higher-quality model.
Prompt adherence weakens when prompts include multiple specific objects or precise spatial relationships. For example, “a red car to the left of a blue house with a cat on the roof” may produce a red car and a blue house, but the cat might be missing or in the wrong location. Single-step models have less capacity to juggle multiple constraints. Mitigation: simplify prompts, use negative prompts to suppress unwanted elements, or generate larger batches and filter for correct compositions.
Model priors become more visible in single-step generation. SDXL Turbo inherits SDXL base’s training biases: certain lighting styles, color palettes, and subject poses appear more frequently than others. This can be a feature (fast stylistic consistency) or a bug (lack of variation). Mitigation: use LoRAs to shift the prior, test multiple Turbo variants with different training datasets, or increase step count to allow more exploration of the latent space.
Color oversaturation or unnatural contrast can occur when CFG is set too high. Single-step models are sensitive to CFG because there’s no iterative correction. Mitigation: keep CFG between 1.0 and 3.0, test at 2.0 first, and avoid CFG above 3.5 unless you want stylized, high-contrast outputs.
Edge artifacts and noise appear with certain sampler and step combinations. Some samplers (especially adaptive or Heun variants) introduce visible noise at very low step counts (1–3 steps). Mitigation: stick to Euler a, DPM++ SDE Karras, or DPM++ 2S a Karras for single-step work, or increase steps to 6+.
Resolution sensitivity varies by model variant. Some Turbo builds handle non-standard aspect ratios (1344×768, 896×1152) without issues, while others produce warped proportions or tiling artifacts. Mitigation: test your target resolution with a small batch before running large-scale generation, and use img2img upscaling if direct high-resolution generation fails.
Text rendering is weak across all SDXL Turbo variants. Single-step generation doesn’t have enough capacity to produce legible text, especially for multi-word phrases or stylized fonts. Mitigation: avoid prompts that require readable text, or add text in post-processing with external tools.
Facial coherence degrades slightly at very low step counts. Eyes, mouths, and symmetry can look off in 1–3 step outputs. Mitigation: use 4–6 steps for portraits, apply face-restoration tools (CodeFormer, GFPGAN) in post, or refine with img2img.
Consistency across seeds is lower in single-step generation. Running the same prompt with different seeds produces more variation than multi-step SDXL, because the single-step model has less opportunity to converge toward a stable solution. This is useful for exploration but problematic for reproducibility. Mitigation: generate large batches, use fixed seeds for final renders, or increase steps to improve seed-to-seed consistency.
Artifact suppression checklist:
Keep CFG between 1.0 and 3.0.
Use 4–6 steps instead of 1 for most production work.
Choose Euler a or DPM++ 2S a Karras for samplers.
Add negative prompts: blurry, low quality, distorted, watermark, text, soft focus.
Test resolution compatibility before large batches.
Refine promising outputs with img2img at denoising 0.2–0.25.
For workflows where quality is non-negotiable, consider a hybrid approach: use SDXL Turbo for rapid exploration and rough drafts, then switch to base SDXL or a high-quality fine-tune for final renders. This balances speed and fidelity without locking you into a single model’s limitations.
Community Model Variants and Per-Model Differences
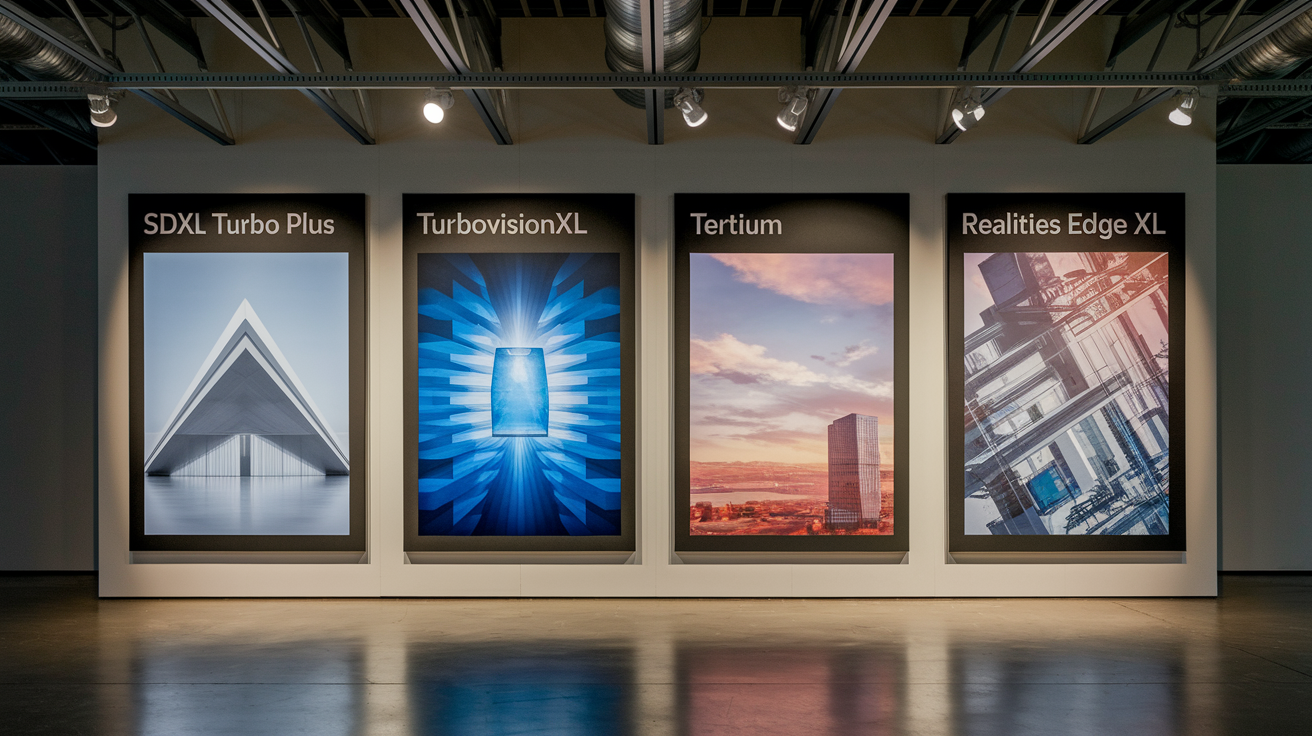
Multiple SDXL Turbo variants exist, each with different training datasets, step-count optima, and sampler compatibility. Testing each variant is essential because performance characteristics differ significantly.
SDXL Turbo Plus is a community build optimized for broader sampler support and slightly higher step counts (4–10 steps). It works well with Euler a, DPM++ 2S a Karras, DPM++ SDE Karras, and DPM++ SDE at CFG 2.0–2.5. Testing showed clean outputs at 6 and 9 steps across multiple resolutions. This variant is LoRA-friendly and handles non-standard aspect ratios without major artifacts.
TurboVisionXL (TVXL-V2.0-BakedVAE) emphasizes photorealism and includes a baked VAE for faster decoding. It performs best at 3–6 steps with CFG 2.0. Outputs lean toward naturalistic lighting and muted color palettes. LoRA compatibility is moderate: photorealism LoRAs show clear effects, but stylized art LoRAs are less visible. This variant is well-suited for architectural renders, product photography prompts, and realistic portraits.
Tertium is a fine-tune targeting stylized illustration and concept art. It requires 6–9 steps for acceptable coherency; 3-step outputs often look rough or undercooked. CFG 2.0–2.5 works well. Sampler recommendations: Euler a and DPM++ 2S a Karras. LoRA compatibility is strong: anime, cartoon, and painterly LoRAs apply cleanly. This variant is slower than SDXL Turbo Plus but delivers more artistic flexibility.
Realities Edge XL variants (multiple versions exist) target ultra-low step counts (1–3 steps) but with quality tradeoffs. Some builds produce usable images at 3 steps, while others require 10+ steps to avoid noise and artifacts. 5-step outputs are often messy. CFG must be kept low (1.5–2.0) to prevent color blowout.
Final Words
We tested SDXL Turbo’s speed, image quality, and cost trade-offs, and walked through deployment steps, compatibility notes, and safety checks so you can decide fast.
Developers, artists, and product teams are the ones who’ll notice the biggest gains—and the places to watch for compatibility or cost surprises are spelled out above.
If you’re curious, try a small prototype, monitor outputs, and adjust settings as needed. The new stability ai sdxl turbo model looks promising for faster iterations and cleaner results.
FAQ
Q: Can SDXL be used commercially?
A: SDXL can be used commercially, but you must follow the model’s license (check Stability AI’s CreativeML/Open RAIL rules and any third-party checkpoint terms); verify attribution and prohibited-use clauses and commercial restrictions before deployment.
Q: What is the most advanced Stable Diffusion model and how does SDXL differ from Stable Diffusion?
A: SDXL is the most advanced Stable Diffusion model; it improves image quality, resolution, and compositional consistency over earlier Stable Diffusion versions by using a larger architecture, richer conditioning, and refined training data.
Q: How does SDXL turbo work?
A: SDXL Turbo works by applying performance tweaks—model pruning, optimized layers, and runtime improvements—to run faster with lower memory and higher sample throughput, usually with minimal quality differences compared with standard SDXL.
